> For the complete documentation index, see [llms.txt](https://python.cyberdefendersprogram.com/llms.txt). Markdown versions of documentation pages are available by appending `.md` to page URLs; this page is available as [Markdown](https://python.cyberdefendersprogram.com/4.-network-management.md).
# 5. Network Management
Welcome to the fourth installment of the Python for Cybersecurity web series!
In the last lesson, we discussed the importance of Machine Learning in cybersecurity and how Pandas can be used to perform data analysis in Python. In this lesson, we are going to see how we can analyze the network traffic.Source:

Before we jump into it, let us brush our fundamentals a little bit and understand what a network is.Source: Lifewire.com

## What is a computer network?
The formal definition according to techopedia.com is, “A **computer network** is a group of **computer** systems and other computing hardware devices that are linked together through communication channels to facilitate communication and resource-sharing among a wide range of users.”
Very simply, a network is something that lets two or more users to communicate with each other. In this day and age where we are heavily reliant on the Internet for almost everything that we do in our day-to-day lives, cyber threats are also on the rise. So, it is important that we understand its functioning which differs with different infrastructures.
## Now, what is network traffic?
Source: [OnlineDataHub](http://onlinedatahub.com/29-of-the-most-insane-traffic-jams-of-the-world/)

Ever stood in the traffic signal and thought, “Where the hell are all these people headed towards?”. Well, that is comparable to a network too!
Just as the name literally means, network traffic refers to the data that is going across the network at a specific time frame. Huge flow in one direction causes congestion here too!
## Does anyone really monitor all this?
I recently logged into an open wifi in a cafe and walked out after an hour or so. The moment I left that radius, I received an email thanking me for using their wifi. Although it is not something that I was unaware of, it felt a little creepy that everything we do in a network is actually monitored!
In addition to this, it has always been an intriguing factor to me about how people are able to find our location from our IP addresses. Have you seen those movies where a hacker is able to snoop into any system and is able to tell where the ‘money’ is or even find the location of where the network requests are coming from? It seems so cool to watch them do all that which motivated me to explore further.
### Finding Geo-Location from IP
All these stuff that seem really high tech are really simple and easy to code — thanks to Python! For finding the geo-location based on the IP address provided, we can use the package geoip2 and access the database. The mmdb file can be downloaded from the below link:[GeoLite2 Free Downloadable DatabasesUsers of our older GeoLite Legacy databases should visit our Support Center for an important notice about future…dev.maxmind.com](https://dev.maxmind.com/geoip/geoip2/geolite2/)
Now, let us write a very simple piece of code to read from the database that is saved in the same directory as the code file. We give a sample input here of 128.101.101.101 to see if it returns the location of the IP.
Code to return country name of the IP targetOutput of the program


Voila! We can now start locating the IP addresses that access our network. (Do not attempt this in any other network and get jailed :P )
Now that we have a hold of the basics, let us try to dig a little deep with one of the most famous packages in terms of network security in Python — Scapy!
## So, What does Scapy have to offer?
Ever done a port scan using the nmap command or traceroute to see how your network request looks like? I have always had hard time remembering the exact syntax of these commands and to type in without looking up! This is where Scapy comes to rescue and offers these and many other powerful operations with one import statement into your program!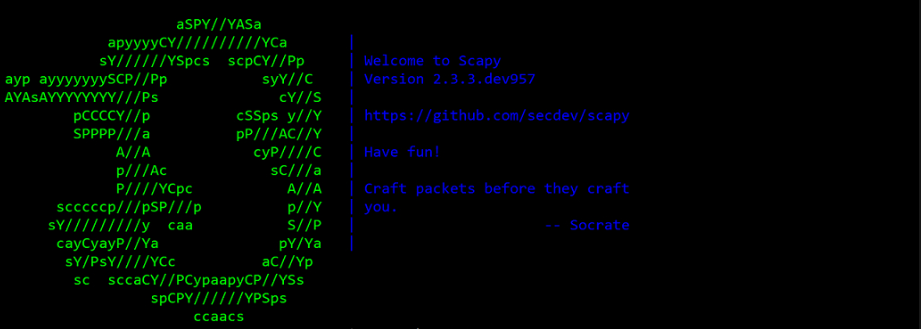
Scapy allows you to decode packets of a wide number of protocols, send them on the wire, capture them, match requests and replies, and much more. The package is so flexible that it allows you to sandwich any feature it has to offer with any other. It resonates with building newer tools where you don’t have to write anything from scratch or even write hundreds of lines of code.
## Lets trace the route!
To understand what Scapy has to offer, let us try to code the simple traceroute command that we use to find the path traced by a request in the network to the implement the ‘traceroute’ command using Scapy in Python!
First of all, let us recollect how the output of traceroute command looks like.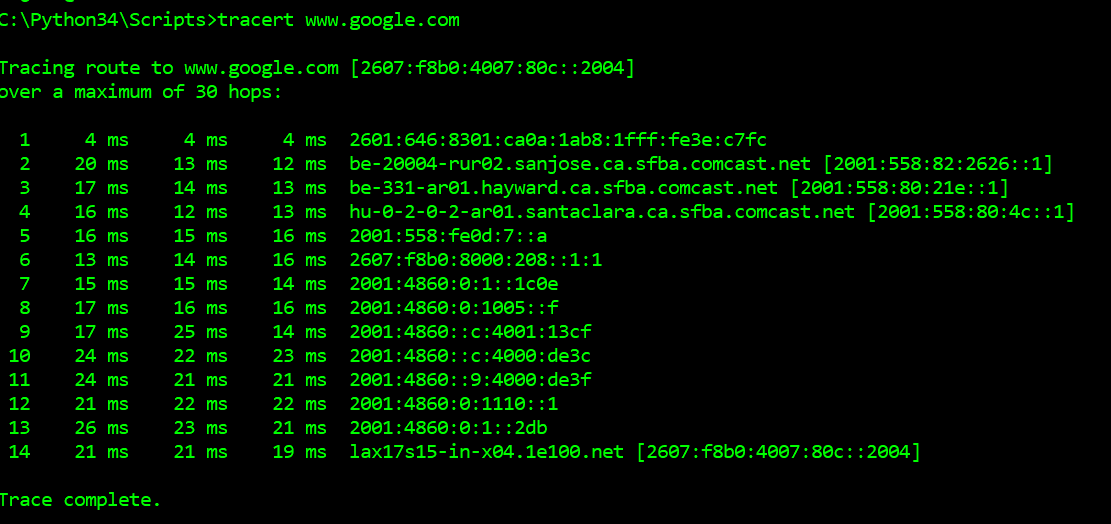
In this example, I am trying to trace the route to [www.wikipedia.org](http://www.wikipedia.org/) and by default it goes upto displaying the details of 30 hops. You can see the time taken to respond and the host network information as the output from the command. Now, that we understand what needs to be done, let us jump to our python implementation.
The sample output should look in this format:
In the code, we first import the scapy package into our code which has the IP and UDP modules. We then store the reply from the network in the reply variable. As shown, the code breaks and exits the program if there is no response or prints the hop count until the destination is reached.
A good reading that I had from the Black Hat Python learning module, for coding the packets sent and received through Scapy is that the methods used differs with the layer of network in question (the seven layers of the OSI model).
* Layer 3: [**sr** (](http://www.secdev.org/projects/scapy/doc/usage.html#send-and-receive-packets-sr)returns the answered and unanswered packets) [and **sr1**](http://www.secdev.org/projects/scapy/doc/usage.html#send-and-receive-packets-sr) (returns answered and sent packets)
* Layer 2: **srp** (returns the answered and unanswered packets) a[nd **srp1**](http://www.secdev.org/projects/scapy/doc/usage.html#discussion) (returns answered and sent packets)
There are many advanced techniques that are employed to monitor the traffic of which Wireshark/Tshark is a predominantly used tool for analysis. It gives us a real time information on what is currently happening in the network. I would suggest reading about that and trying to implement a simple packet analysis code in Python to gain thorough understanding of how the packets are sent and received in a network.
With this, we come to an end of this lesson on a brief introduction to network and traffic analysis.
Happy Learning!
## Practice
1. Create a python script that sends and receives packets, and then displays the information pertaining to those packets.
2. Advanced: Try to implement a network port scanner using Scapy.
## Learning Resources
1. All that you need to learn about Scapy is here:
2. For hands-on exercises from simple to advanced level related to computer security:
3. For help on how to implement nmap scanner in Scapy:
4. Another example for implementing a simple port scanner using Scapy:
5. For further information on traceroute function:
6. An advanced implementation of our python implementation in Scapy: